Face
Proportions
Face
Proportions| Face
Proportions |
|||
Technique
Demonstration:
Face Proportions (Front View)
|
You will need:
|
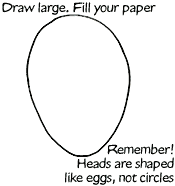
Many artists want to make realistic portraits that show how someone looks. To do this, you have to learn about face proportion. Are you ready? We’ll start with a front view. (When you are done, you may want to try a profile or three-quarter view.) 1. HEAD. Draw a large head shape on your paper. 2.
EYES.
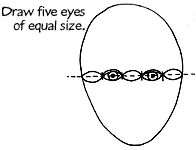
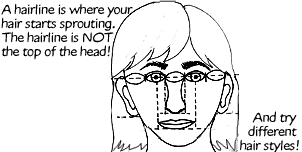
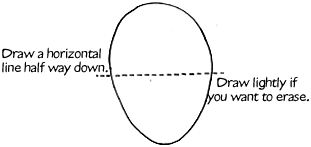
Eyes are halfway down the face. So use your ruler to divide your head
in half with a horizontal line. Draw lightly (you may want to erase
it later).
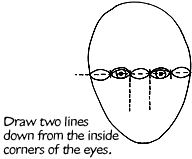
3.
NOSE. The size of the nose depends on the person. The bottom of
the nose is often as wide as the inside corners of the eyes. So you
can draw two lines down from the inside corners of the eyes.
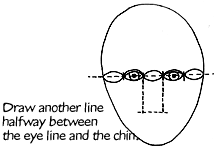
Usually,
the bottom of the nose is halfway between the eye line and the bottom
of the chin. Now you have a "nose box"—draw the nose!
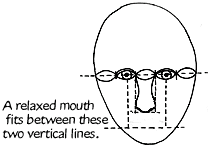
4.
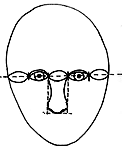
MOUTH.
Draw another line half way between the nose and the chin.
Now
draw the mouth!
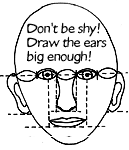
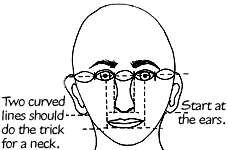
5. EARS. Ears are bigger than many people think! They stretch from the eyes to below the nose. Use the horizontal line you first drew for the eyes to line up the top of the ears. They will end between the bottom of the nose and the mouth. 6. EYEBROWS. Eyebrows tell a lot about a person’s mood. They come in all different sizes and shapes (and some people pluck them out!) A gentle arch over the eyes should do for a relaxed face. 7. NECK. Most people draw the neck too thin. A head weighs eight pounds so necks are big and strong! Start at the ears and gently curve in then out again.
Make
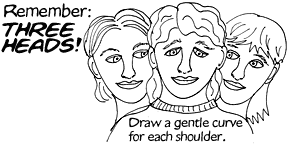
the shoulders wide enough so you could fit another head on each shoulder. Good work! Now you can draw front-view portrait! Draw another and another and another until you don’t need to draw the guidelines.
|
|||||
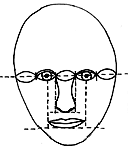
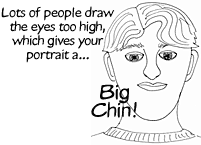 This
will look a little alien until you add eyebrows and hair. But don't
draw the eyes too high!
This
will look a little alien until you add eyebrows and hair. But don't
draw the eyes too high!
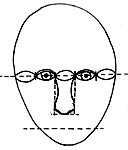
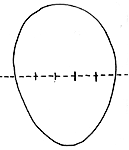 If
you look at someone face on, they will have room for five eyes across
the front of their face! You can divide the horizontal line into five
equal spaces to figure out how big to make the eyes.
If
you look at someone face on, they will have room for five eyes across
the front of their face! You can divide the horizontal line into five
equal spaces to figure out how big to make the eyes.